
Managing a sloping garden can feel a little tricky, but with the right ideas and design, it can become one of the most beautiful pieces of your home. Instead of viewing the slope as a problem, see it as a way to create layers and steps with unique views, offering what flat gardens can’t.
In this guide, you will learn to landscape a sloped garden step by step, from design ideas and retaining wall construction to planting and drainage.

What Is a Sloping Garden?
A sloping garden is a piece of land that slopes rather than being level. You could have:
- A garden which slopes upwards, away from your house.
- A garden that slopes downward, towards your house.
- A multi-level or terraced garden.
Sloping beds can make planting and mowing more difficult. With some creative landscaping, a slope will always look stunning and natural.
Why Landscape a Sloping Garden?
There are plenty of reasons to landscape a slope. It helps prevent soil erosion, improves drainage, and generally makes your garden safer to use.
Benefits
- Prevents soil/raindrop erosion.
- Initiates flat segments for patios, lawns, or seating.
- Visually captivates through artificial landforms.
- Attenuates garden upkeep.
- Enhances property appreciation.
Sloped patches can create magnificent, intricate, and lively tiered landscapes when appropriately executed. Each step is identified, designed, and constructed to facilitate the process of achieving your desired sloped garden.
Step 1: Assess the Slope
Understanding your garden is vital.
Considering the slope, is it a sharp crossing or a gentle one?
Considering the soil: Is it clay, sand, or loam?
Considering water flow: Where is the water collected after a rain, or where does it flow?
Considering sunlight: Which area has a surplus of sunlight and which area has a deficit?
A design sketch helps you plan the area according to your slope requirements.
A perspective sketch assists in the governance of design in connecting the high- and the low-design regions.
Step 2: Plan the Layout
Plan the garden’s use for each leveled section.
Example usage: I’ll have a seating area at the top of the garden, flower beds in the middle, and the lawn, pond, and vegetable garden at the bottom.
Between the garden’s different levels, you may use terraces, steps, and pathways to connect the distinct segments for more straightforward navigation and a more intentional flow.
Pro Tip: Always design garden levels with safe, convenient access points, especially if children or older people will use the garden.
Step 3: Construct Your Retaining Walls
Retaining walls keep soil in place and create flat terraces for planting or sitting.
Common materials to use for a retaining wall include:
- Natural stone
- Concrete blocks
- Timber sleepers
- Bricks or gabion baskets (wire cages filled with rocks)
Retaining walls also add structure and can double as seating or decoration.
Things to keep in mind:
- Make sure the walls are strong enough to withstand soil pressure.
- Add drainage pipes or gravel behind walls to prevent water buildup.
Step 4: Construct Steps and Pathways
Steps and pathways are significant for moving easily around a sloped garden. They also have a great potential to increase the charm of your gardens cape.
Here are some ideas:
- Use natural stone or wood for a rustic look
- Build wide, shallow steps for safety
- Place low lighting along paths for evening use
- Use winding paths that follow the slope instead of steep stairs to achieve a more natural look and feel.
Step 5: Improve Drainage
Poor drainage is a common problem with sloping gardens. If it is not addressed, rain will wash away garden soil and flood the lower levels of the garden.
Drainage options
- French drains
- Soakaways
- Gravel channels between terraces
- Permeable paving stones for patios
These components create and maintain a smooth flow and prevent erosion.
Step 6: Select Suitable Plants
The plants selected for a garden slope impact the overall design. Select plants that can stabilize soil and tolerate uneven terrain.
Best plants for sloping gardens:
- Ground covers: creeping thyme, vinca, sedum
- Shrubs: lavender, rosemary, juniper
- Ornamental grasses: miscanthus, blue fescue
- Flowers: geraniums, daylilies, hostas
Planting Tips
- Taller plants should be placed at the top for visibility, as the shorter plants will be below them.
- Use deep-rooted plants to prevent erosion.
- Use a combination of colors and textures to achieve balance.
Step 7: Incorporate Seating and Other Elements
Even sloped areas can be used for relaxing outdoor spaces.
- A small deck or patio can be built on a flat terrace.
- Garden benches can be built into retaining walls.
- A fire pit can be built on a middle level.
- Solar or fairy lights can be used to create ambiance.
- Place planters and pots on steps or walls.
Cozy seating can be placed along with a sloping garden. This allows the sloping garden to be both functional and beautiful.
Step 8: Use Mulch and Ground Covers
Mulching helps protect your garden soil from erosion and weeds.
Some things you can use are:
- Wood chips
- Gravel
- Bark mulch
- Ground-cover plants
Using these will make your garden look tidier and easier to maintain.
Step 9: Add Water Features
Running water is beautiful to look at and is perfect for sloped gardens. The natural forces of gravity will pull the water down the slope.
Some ideas include:
- Cascading waterfall
- A small stream or pond at the bottom
- Solar-powered fountain
Just be sure to install your water liners and pumps to keep your water features from becoming a mess.
Step 10: Regular Maintenance
Completing the sloped garden is a huge accomplishment, but to keep it safe and beautiful, you will need to maintain it regularly.
Some things to include in your maintenance routine are:
- Checking for cracks in the walls and steps
- Drains and gutters after a rain
- Pruning the plants
- Adding fresh mulch
- Checking for soil erosion or sinking
With some attention, your sloping garden can remain beautiful for years to come.
Design Ideas for Sloping Gardens
Depending on your style, here are a few design ideas you could try:
Terraced Garden
Use retaining walls to make flat sections. Each terrace can have a different plant or theme.
Natural Slope Garden
The natural slope can be kept. Shrubs, grasses, and ground covers can be added to give a soft, natural look.
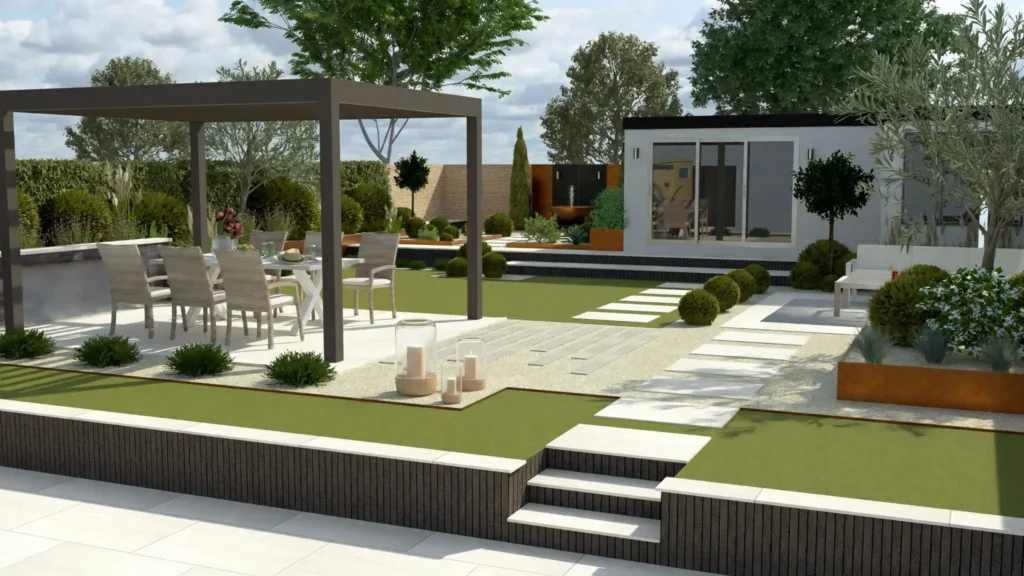
Contemporary Tiered Structures
For a minimalist garden, use smooth concrete walls, steps, and lighting.
Gravel and Stone Garden
If you want a low-maintenance garden on a hillside, you can add rocks, gravel, and plants that require little water.
Cascading Waterfall Garden
Why not use that gently sloped area for a cascading water garden with flora around it?
Mistakes to Avoid
- Ignoring drainage will cause erosion and flooding.
- Heavy walls without sufficient foundations.
- Steep slopes with shallow-rooted plants.
- No steps and easy access were forgotten.
- Terraces with too much soil can cause overloading.
Be thorough in your planning and your steps. Sloped gardens are demanding, but the outcome will be excellent.
Why Hire a Pro?
A landscaper can help you prepare safe retaining walls, plant layouts, drainage systems, and other design components.
Advantages:
- You will avoid costly design flaws.
- You will receive garden-shaped ideas that are created and constructed.
- Long-lasting and low-maintenance design.
- Mix DIY with professional plans to save money.
Conclusion
Planning and building terraces can make a sloping garden look more creative. The plant choices with improved drainage will turn a sloping area into a beautiful garden.
You might prefer a natural hillside full of flowers, or a modern terraced patio. The key is to work with the slope, not against it. With a bit of design, your sloping garden can become the most beautiful and serene part of your home.